Wednesday, October 30, 2013

Finished Part 4 Vase for Love Entwined

I have finished Part 4 of LE, which doesn't mean I have totally completed the previous parts, I am trying to get it all done, lol.

So here are a couple of photos. I will be getting Part 5 vase of flowers prepped over the next few days I hope...


Not much else going on in sewing/quilting because I have been so focused on this project.  Hope everyone else doing LE is enjoying it as much as I am.

Happy stitching,
Rowena


Thursday, October 10, 2013

Love Entwined Part 4

I have been working on the applique on LE fairly regularly and really enjoying the hand work.  I did fiddle around quite a bit trying to decide on appropriate fabrics for Part 4, the vase of flowers.  Initially I thought I would do it all Broderie Perse but as I cut out the fabrics I felt I wanted a more scrappy look so I have mixed it up a bit.  I also settled on stem stitch embroidery for the flower stems and I am really pleased with the ones I've done so far.  I haven't religiously stuck to the pattern , I liked the pattern but felt a less crowded look would suit my little project better.  So I have used some much smaller flowers and skipped a couple altogether.  I'm in the process of prepping the berries and then I won't be far off finishing this section and I can go back and complete a couple of things that I didn't finish, that pesky zig zag...ric rac is looking better and better, lol.  I have some very teeny circles to stitch down and four more Oak Leaf type shapes to complete.  I can't wait for the next part to be released!

Here are a couple of photos ( I definitely ain't no great shakes as a photographer)


Better get back to prepping so I can stitch the berries down tonight.

Happy stitching,
Rowena

Friday, September 6, 2013

Love Entwined Part 3 Progress

I have been stitching away on LE and am gradually getting it done.  I can't help looking forward to the next pattern release even though I haven't completed the last 2 yet!

I also called in to my LQS and chanced upon a few really lovely fabrics by Mary Koval that I think will be perfect for LE.  I love the Ombre with spots, the blue and the pink, I hope I can find a place for them. In the first photo below you can see 3 of the Mary Koval fabrics on the left of the photo, the little pink flower sprig on the light cream background and the green with large floral is a Blackbird Designs fabric. I think the light blue with the feathery leaves is lovely, Mary Koval again.


A better photo of my progress so far.


And a photo of a collection of fabrics I think will find their way into LE.  Apart from the few I mentioned above they are from my stash.


Tonight I am not cooking, yay!!  So while I can, I will  grab LE and stitch to my hearts content, probably late into the night, no school run in the morning and Rugby season for us is over!

Enjoy your weekend.

Happy stitching,
Rowena


Sunday, August 18, 2013

Love Entwined Flowers and Zig Zag

The third instalment of the LE BOM arrived a few days ago.  I was very excited to see what was next even though I am not quite up to date, but I am getting there.

The zig zag border has been the subject of quite a bit of discussion and I wouldn't be surprised if a little private cursing wasn't going on too!  I started off trying the English Paper Piecing method using the fusible wash away stabiliser in place of paper or card but soon decided it was too labour intensive.  There had to be another way!  I scoured the Yahoo Group messages and visited some wonderful blogs where other generous and more experienced ladies had posted their method of attack, step by step thankfully!!  I finally settled on the method of machine stitching light and dark strips together which I then ironed a freezer paper template to so I could cut out a fairly accurate strip, marked, ready for needle turn applique.  I have nearly finished one side but have yet to deal with the corners...ummm.

On a brighter note, I have had a lovely time sewing the pink flowers and am looking forward to starting the next applique.

I also added more tiny circles around the compass, all the French Blue ones.


Not a great photo of the zig zag, sorry.

I have also finally sewn on a border and quilted a quilt I began from a class I took quite a few years ago with Australian quiltmaker, designer and author, Judy Hooworth.  I had a bit of a play with a quilting motif by Judy from Green Fairy Quilts on the border and in the setting squares.  I'm really quite pleased with the result and it was fun to stitch.  With the really busy fabrics there was no point in doing anything too fancy as it wouldn't show up but this design gives a nice texture to the quilt and where you can see it I think it works well.  Judy(Green Fairy) posted a video on how to do this design on You tube, it's worth a look, as is anything this extremely talented lady quilts!  I used King Tut thread top and bottom and a really nasty cotton batting I received as a free gift with a magazine subscription.... no wonder they were giving it away!  It pulled apart with the least tension put on it and it is really thin with a nasty rough hand.  I will gently wash the quilt once I finish stitching the binding  down and put it in the tumble drier which will hopefully shrink it up a little to give it a nice crinkly look.  I have no idea what brand of batting it is, there was no label and I've never come across anything like it for sale, thankfully!


You can see the quilting motif best in the border on the right in the last photo, my version of it anyway ; )

Well, back to Love Entwined and I am still squeezing in some stitching on the Whig Rose blocks.

Happy stitching,
Rowena


Wednesday, July 31, 2013

Love Entwined Progress...Baby Steps

I bit the bullet and did the tiny circles surrounding the compass, and you know what, it wasn't so bad at all!  I admit I didn't do the patterns 32 circles but I am really happy with the result of my adjustment.  I have also stitched down all the triangels for the crown around the compass.


Late last night I put together the 6 petals for the applique I will do today.  I glued them down with Roxanne's Glue Baste so I could see how they look (the fabrics).  I think I like the fabrics I have chosen.


I really should have cropped that photo,oops!  Oh well, I am happy with the pink fabrics now I see them in this picture.

I've had a bit of a cold so I haven't done any stitching on my Whig's Rose but I will try to get some done later today.  I also have a quilt on the longarm but I haven't been able to decide how I will quilt it yet.  I'll show you when it's finished.

Have a great day.

Happy stitching ,
Rowena


Tuesday, July 23, 2013

Love Entwined compass Crown and Flowers

I had been waiting for a parcel to arrive so I could continue with the next stage of Love Entwined, a 1790 marriage coverlet Esther Aliu is offering as a free BOM.  Esther has suggested using a wash away fusible applique product I have never tried before.  I was unable to find the Floriani brand she suggested but did manage to buy a product that does the same thing, Wash Away Applique Sheets by C & T publishing.  I trace the pattern piece onto the sheet , cut it out sans seam allowance and iron it to the wrong side of the fabric eyeballing a seam allowance.  I then use Elmers glue stick to glue the seam allowance over the edge of the wash away fusible then stitch it as I would usual applique.  Once the quilt top is made you wash it and the fusible wash away does just that, it washes away leaving just a little fibre which gives the applique a very very slight puff, barely visible.  So far I am loving this. I have recently been using freezer paper in the same way but you have to cut away the back of the applique and background to remove the freezer paper, this new technique makes it possible to avoid that step, suits me!

Here is where I am up to now, the triangles forming the crown are just glued in place ready for stitching down, but I am so pleased with the result so far, I am enjoying this so much.  Those little stems were tiny little suckers!


The little flowers, someone said they look like they are blowing in the wind, lol.


I still have to stitch the tiny circles around the compass, after the crown triangles, ahem!

I have also still been appliquing my Whig Rose blocks, I am on the home stretch of block number 2, it's going to be lovely, I think.

Happy stitching,
Rowena


Monday, July 15, 2013

Compass progress for Love Entwined BOM

I stitched the centre on the compass block, a four patch cut into a circle.  I didn't like the look of it so unpicked it and started again but with a single print, much happier.  I also have sewn the narrow circular border on ready for 32 teeny, weeny circles!  I went to 3 shops today trying to find a circular paper punch the right size with great intentions of making the task easier, no luck.  I settled on some tiny metal washers from the local hardware store.  I will use the washers to make the circles then starch them very well before removing the washer so I can sew the circles down.


The second set of patterns have been released so had better get a move on.  I have bought the background fabric and had a look at some blues today but I am thinking I may do a very scrappy version and try to use up some of the fabrics I have accumulated over the years.

Happy stitching,
Rowena

Friday, July 12, 2013

Love Entwined, am I mad?

 Esther Aliu has a beautiful new BOM that started this month called Love Entwined.  It's a bit quilt with literally tons of applique.  I'm afraid I have succumbed after seeing all the beautiful work on the first block, a compass design.  I had never attempted a Compass block before yesterday so I decided foundation piecing would be a good way to go.  I didn't do too badly after messing about with a trial segment to re-aquaint myself with the process. Here's where I am up to .


I think the fabric choices ended up taking longer than the actual sewing!  I am pretty happy with the result.

I have also finished the quilt top I was making for my youngest son.  I have used a jelly roll by Minnick and Simpson, the border fabric is the same range.


I have another quilt top on the Longarm which I have to finish quilting before I can quilt this one.  I am still loving doing the applique on the Whig Rose but nothing new or thrilling to show yet.

Better get up and start my day, taking my daughter for her last visit to the Orthodontist today, pretty exciting for her.

Happy stitching,
Rowena


Tuesday, June 25, 2013

First Whig Rose Block

It has taken a week of stitching every spare moment to complete the first of 9 blocks.  I am so pleased with it , I can't wait to get on with the next one!  I think the fabrics work really well together.


That's all for now, I have to get back to block number 2!!

Happy stitching,
Rowena

Wednesday, June 19, 2013

Whig Rose Block Progress

I don't know if you can tell but I'm really excited about this quilt.  Over the past 5 years or so I've discovered I really enjoy hand applique.  So when I finished a recent applique project I was looking for something to keep my little hands busy while I watched/listened to a couple of my favourite television shows.

I have always loved any antique quilt that included red, green , a bit of yellow and perhaps a little pink and of course plenty of applique.  I have always felt a full applique quilt would be biting off more than I could cope with so it had remained "one of those days" type of dreams until last week.... I don't know what changed but I found myself drawing up the pattern from a photo of a beautiful antique gem....next I was at my LQS working out yardage AND buying it, still a little in shock at what I was doing.

Now , so close to the finish line of the first block, I don't know what I was so worried about, it's been  really fun and I cannot wait to get all the blocks done.  I haven't yet decided if there will be an appliqued border or not, I will make that decision after another 8 blocks are completed!  So, another progress photo!  I will be using the same fabrics in each block, I love the colours together on the centre flower! It's not exactly perfect but I love it how it is.


and a close up of miss pretty...


I'd love to keep chatting but I need to sew a couple more leaves and / or flowers on before I have to make dinner.   Why do families have to eat???

Happy stitching,
Rowena


Monday, June 17, 2013

Centre Applique Block

Another post so soon!!  The weather is cold and it's definitely been perfect for sitting in a nice warm room doing some applique.

Years ago I bought this border print fabric on impulse.  Fortunately I bought enough of it to be truly useful and finally decided on a quilt plan to use it.  I did play with it as vertical strips in a strippy type quilt but preferred the medallion using it as borders.  The photo is the applique block (28" square) from When the Cold Wind Blows book by Blackbird Designs and the first border using said fabric.  I think I will follow that with some scrappy pieced blocks and then some more applique perhaps, not sure. I will however, finish with another border of the pink border design fabric.  Sounds like a reasonable plan to me.....

First a wider green then the pink. No, it needs to be narrower.


I apologize for the terrible angle and terrible photo but I was holding the fabric up and taking the shot at the same time.


That looks better, the photo and the narrower green border but it won't be that close to the applique, testing fabrics is not an exact science!.

I really don't have too much of the red and green applique block done but here's where I was a day ago, I am now nearly ready to stitch the large central rose, exciting!  I can't wait to get the first block completed, I really am full of enthusiasm for this quilt, only 9 blocks to do, he he.


Back to the applique, I hope to get plenty done today, I have to take my Mum for blood tests so there is opportunity for guilt free stitching while we wait!  Yay!

Hope you all had a great weekend. Any Australian ladies who made it to the Sydney Quilt Show, I didn't make it this year for the first time in many years, so if it is possible, some photos on your blogs would be greatly appreciated!  I have seen photos of the stunning Best of Show by the very talented Janet from the Quiltsalott blog but would very much like to see any more quilts that may have caught anyone's fancy.

Happy stitching,
Rowena


Tuesday, June 11, 2013

Something to post about, at last!!

It's been toooo long.  I've still kept up with all my favorite quilty blogs , just haven't had much to blog about myself :((

I have a couple of works in progress, the first is much further ahead than the second but I'm pretty excited about the second one!

I bought this great pattern for a Jelly Roll quilt by the clever Pam and Nicky Lintott to make a quilt for my 12 year old son, Jorden.  The blocks went together very quickly and so simply!  I have used Independence Trail by Minick and Simpson, 1 Jelly Roll and some yardage plus some background yardage from French General.


I am going to use the gorgeous red fabric below for a border, not included in the pattern but I want the quilt to be a little larger.


The colour is a little wacky because I didn't use a flash, just the lightbulb in the room but you see how lovely it is, Minick and Simpson, Independence Trail again.

Here are the blocks so far.


I am really looking forward to getting this finished and ready to quilt, I think my gorgeous boy will like it.  It's been pretty cold and miserable lately so he will certainly appreciate its warmth.  I think I'll use a 60% wool 40% polyester batting, I've used it many times and love the way it quilts.  It's cozy , warm and not too heavy as well as machine washable.

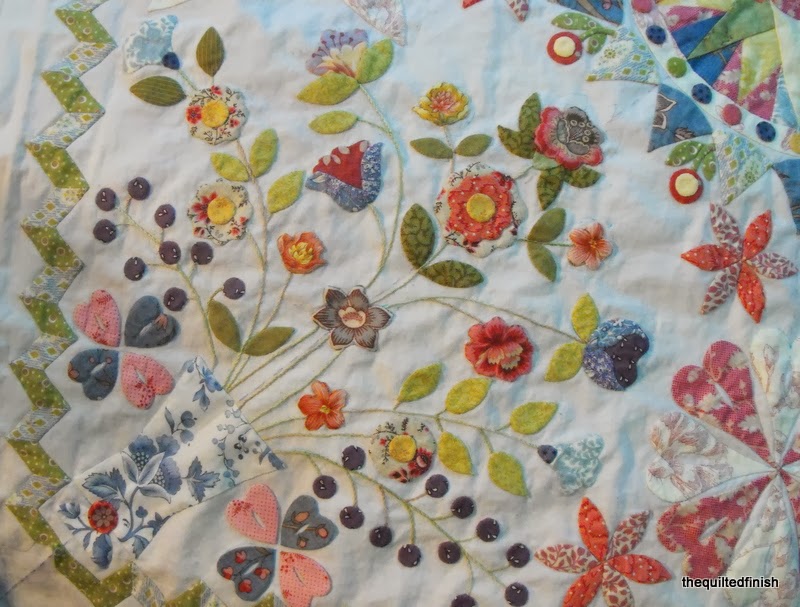
The other project I have started this week is a Rose Wreath. I Googled "Rose Wreath quilts" on Images and drew up my own pattern, a little imperfect!  I rushed out and bought the fabric for the background, a white quilter's muslin.  I also bought the green and the yellow then stumbled with the red because the pattern has a double pink against the red so I had to be very careful.  I brought home a couple of samples and was horrified at how awful they looked with the double pink I planned to use.  I was feeling a little frustrated when I remembered I had some wonderful red fabric from a project I have been working on in fits and starts for a while.  Long story short it was perfect, a very raspberry red, so I rushed out to my LQS and asked if they had any left, "no sorry", they only had a small piece in the remnant basket, shock horror!  Oh, wait a minute!  They had another print but the same colour run!!! It's even more appropriate, printwise, than my original red so I went home a very happy camper!  Fabric sorted I couldn't wait to get started on the first block, of which there will be nine!  I hope I can keep up the momentum.  I never was crazy about applique but really fell in love with it a few years ago, I love that it's portable and very soothing to do in the evening.  This may take a while to complete but It should be lovely with plenty of space to fill with feather quilting!!

Here is my pattern, it's in pencil (so not terribly clear) and on 6 sheets of A4 printer paper stuck together with masking tape, I'm no expert pattern drafter!  However, it does the job!


I am using freezer paper templates ironed onto the right side of the fabric then I trace around the freezer paper with the white Clover marker and do needle turn applique.  I have traced the pattern onto the white background fabric with a wash out blue marker, using dots where I can. I may try something different with the next block as I'm not 100% comfortable using these markers after all the horror stories I've read of the marks returning months after the project has been completed and the marker washed out! I am removing the marker as I go!!

I will post a picture of the fabrics and my applique progress in a day or so, should have taken some before I started this post, sorry!

Feels good to be posting again.

Happy quilting,
Rowena